Learn how to install mini splits with our step-by-step guide, assessing your DIY skills, local regulations, and necessary tools and materials.Are you considering installing a mini split system in your home but wondering if it’s a task you can tackle on your own? Mini splits have gained popularity for their energy efficiency and versatility, making them an appealing choice for homeowners. However, the thought of a DIY installation can be daunting. This blog post will guide you through the essential considerations to determine if you possess the skills required for such an endeavor. We’ll explore the basics of mini splits, evaluate your DIY expertise, investigate local regulations, and help you gather the necessary tools and materials. Finally, we will provide a comprehensive step-by-step installation process to equip you with everything you need for your mini split project. Whether you’re a seasoned handyman or a curious beginner, this guide will help you navigate the journey of installing a mini split system yourself.
Understanding Mini Splits
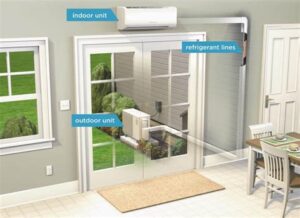
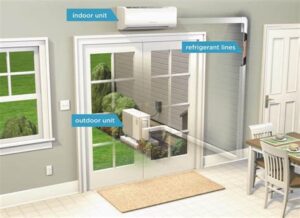
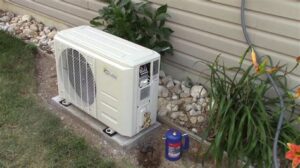
Mini-split systems are a popular choice for heating and cooling homes. They are efficient, flexible, and can provide both heating and cooling through one unit. A mini-split, also known as a ductless mini-split, consists of two main components: an outdoor unit and one or more indoor air-handling units.
One of the key advantages of mini-splits is their ability to offer zone control, meaning you can heat or cool specific areas of your home without affecting the entire space. This is particularly useful for homes with different heating and cooling needs, allowing for personalized comfort and increased energy efficiency.
When considering installing a mini-split, it’s essential to evaluate factors such as the size of your space, insulation, and the efficiency rating of the unit. Proper installation is crucial to ensure optimal performance and longevity of the system. Understanding how a mini-split operates and its components will help you make informed decisions about your heating and cooling needs.
Assessing Your DIY Skills
Before you embark on the journey of installing a mini split system, it is critical to evaluate your DIY skills. This type of project can be complex, requiring a good understanding of electrical systems, plumbing, and HVAC principles. If you possess a basic familiarity with these skills, you may be well on your way to a successful installation.
Start by honestly assessing your experience level. Have you ever tackled home improvements like painting, installing fixtures, or working with electrical wiring? If so, you may have a valuable foundation to build on. If not, it might be worth considering enlisting the help of a professional or a knowledgeable friend.
Furthermore, consider your comfort level when it comes to using tools such as drills, wrenches, and multimeters. A good rule of thumb is to ask yourself: Do you feel confident reading and following technical instructions? If the answer is yes, you might be ready to proceed.
Finally, look into local regulations or any permits that might be necessary for installing a mini split system. Ensure you’re prepared to comply, as this could also affect your decision to go the DIY route.
Researching Local Regulations
When considering the installation of a mini-split system, it is crucial to first check the local regulations in your area. Different regions may have specific codes and regulations that govern the installation of HVAC systems, including mini-splits. This can include permitting requirements, restrictions on equipment type, or even local licensing for installers.
Start by contacting your local building department or municipal office to inquire about the necessary permits. Some areas may require a permit for installation, especially if it involves electrical or plumbing work. Failing to obtain the required permits can lead to fines or issues when selling your home later.
Additionally, it’s wise to research if there are any HOA (Homeowners Association) rules or guidelines if you live in a community governed by one. They may have specific aesthetic or installation standards that you need to abide by to maintain the visual integrity of the neighborhood. Ignoring these can lead to u
Gathering Tools and Materials
Before diving into the installation of your mini-split system, it’s essential to gather all the necessary tools and materials. Proper preparation will help ensure a smooth installation process and prevent any delays. Below is a list of the key tools and materials you’ll need:
| Tools | Materials |
|---|---|
| Drill | Mini-split unit |
| Screwdriver set | Insulated copper lines |
| Level | Drainage hose |
| Tape measure | Refrigerant line insulation |
| Pipe cutter | Electrical wiring |
| Stud finder | Wall brackets or mounting hardware |
As you gather your tools, pay attention to the specifications required for your mini-split system. This may include unique requirements for the electrical setup or specific sizes for the insulated copper lines. It’s advisable to read through the manufacturer’s instructions carefully.
After ensuring you have all the necessary materials, set up your workspace. A clean and organized area can significantly enhance your efficiency and safety during installation. Make sure to have all items within reach, minimizing unnecessary movements.
By taking the time to gather the right tools and materials, you are positioning yourself for a successful DIY installation of your mini-split system. With everything prepared, you’re ready to move on to the next steps in the installation process.
Step-by-Step Installation Process
When considering the question of can you install mini splits yourself, it’s crucial to follow a careful and structured step-by-step installation process. This will ensure the unit operates efficiently and safely. Below is a comprehensive guide to installing mini splits on your own.
Step 1: Plan the Installation
- Choose the locations for the indoor and outdoor units.
- Consider accessibility for maintenance and the proximity to electrical connections.
- Ensure that both units can connect easily with refrigerant lines and electrical wiring.
Step 2: Prepare the Area
- Clear any debris or obstacles from the installation area.
- Make sure the surface where the units will be mounted is sturdy and level.
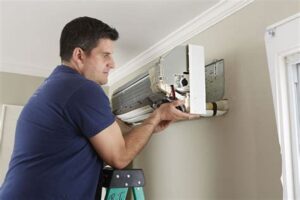
Step 3: Install the Indoor Unit
- Mount the mounting bracket to the wall and ensure it is level.
- Drill a hole for the refrigerant lines and conduit, making sure it slopes slightly down towards the outside.
- Attach the indoor unit to the bracket following the manufacturer’s instructions.
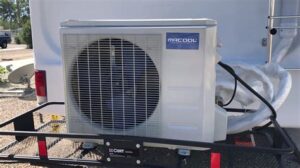
Step 4: Install the Outdoor Unit
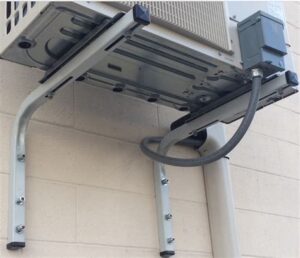
- Place the outdoor unit on a level surface, ideally above ground to avoid flooding.
- Connect the refrigerant lines and electrical wiring according to the manual.
Step 5: Final Connections
- Make the final electrical connections and secure all lines.
- Check for any leaks in the system.
- Power on the unit and test its functionality.
By following this detailed step-by-step installation process, you can successfully learn if you can install mini splits yourself. Just remember to proceed with caution, ensuri
Frequently Asked Questions
What are mini splits?
Mini splits are a type of heating and cooling system that consists of an outdoor compressor and one or more indoor air handling units. They are known for their energy efficiency and flexibility in installation.
Can you install mini splits yourself?
While it is possible to install mini splits yourself, it is recommended to hire a professional for optimal performance and to comply with local building codes and regulations.
What tools do I need to install a mini split system?
Essential tools for installing a mini split include a drill, level, screwdriver, wrenches, refrigerant gauges, and possibly a vacuum pump.
What is the importance of proper installation for mini splits?
Proper installation is crucial for mini splits to function efficiently, avoid potential refrigerant leaks, and ensure longevity. Incorrect installation can lead to increased energy costs and system failures.
How much does it typically cost to install a mini split system?
The cost of installing a mini split system can range from $2,000 to $5,000 depending on factors such as the number of units, complexity of installation, and local labor rates.
Are there any maintenance requirements for mini split systems?
Yes, mini split systems require regular maintenance, including cleaning or replacing filters, checking refrigerant levels, and ensuring the outdoor unit is free from debris.
What are the benefits of using mini splits?
Mini splits offer several benefits, including energy efficiency, zoning capabilities, minimal ductwork requirements, and quiet operation.
