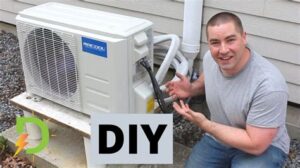
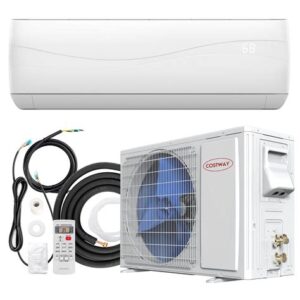
Explore the pros and cons of DIY mini split installation, assess your skills, and learn step-by-step to avoid common mistakes.Are you considering installing a mini split air conditioning system but unsure whether to tackle the job yourself or hire a professional? With the rising popularity of mini splits for their energy efficiency and versatility, many homeowners are exploring the DIY route. However, before diving into this project, it’s crucial to assess your skills and gather the right tools. In this blog post, we’ll explore the ins and outs of mini split installation, providing a step-by-step guide for those brave enough to take on the challenge. Along the way, we’ll discuss common mistakes to avoid and weigh the benefits and risks of a DIY approach versus hiring an expert. Whether you’re a seasoned DIYer or a novice, this guide will help you make an informed decision about your mini split installation journey.
Mini Split Installation: DIY or Professional?
Installing a mini split can seem enticing, especially with the rising costs of professional installation. Many homeowners contemplate the question: can you install mini split yourself? While the answer may lean towards a positive, it is essential to thoroughly evaluate your DIY skills before making a decision.
Mini splits consist of two main components: an indoor unit and an outdoor unit. This complexity can make the installation process quite challenging. Let’s break down key aspects that can help you decide whether to go the DIY route or hire a professional.
Assessing Your DIY Skills
Installing a mini split requires a combination of electrical, plumbing, and HVAC skills. Here are some critical skills you should assess:
- Electrical Skills: Knowledge of basic wiring and safety precautions.
- Plumbing Skills: Ability to handle refrigerant lines effectively.
- Tool Proficiency: Familiarity with essential tools like a vacuum pump, level, and pipe cutters.
Tools Needed
Before attempting a DIY installation, ensure you have the following tools:
| Tool | Purpose |
|---|---|
| Drill | To make necessary holes for mounting the unit |
| Pipe Cutter | To cut refrigerant lines to size |
| Vacuum Pump | To remove moisture from refrigerant lines |
| Level | To ensure units are properly aligned |
After assessing your skills and gathering the right tools, the next step is to understand the benefits of hiring a professional vs. the excitement of DIY installation. While taking on an installation project may seem rewarding, the potential long-term risks could outweigh the initial savings.
If you are uncertain about your capabilities or are not completely confident in following through with the installation, consider seeking professional help. After all, ensuring that your mini split works efficiently requires precision and expertise.
Assessing Your DIY Skills and Tools Needed
When considering whether to install a mini split system yourself, it’s crucial to conduct a thorough self-assessment of your DIY skills. Installing a mini split is not just about following a set of instructions; it demands a solid understanding of HVAC systems, electrical work, and plumbing. Therefore, the first step is to evaluate your experience.
Ask yourself the following questions:
- Do you have experience with electrical wiring and circuit breakers?
- Are you comfortable handling refrigerants and have the proper certification?
- Do you own the necessary tools for installation, such as a vacuum pump, pipe bender, and electrical multimeter?
If you can confidently answer yes to most of these questions, you may have the skills needed for a successful DIY installation. However, if you find any area lacking, it might be wise to consult a professional. The tools required for this project can vary, and having the right equipment is vital for a safe and effective setup. Below is a list of essential tools you might need:
| Tool | Purpose |
|---|---|
| Vacuum Pump | To remove moisture and air from the lines |
| Refrigerant Gauge Set | To check pressure levels in the system |
| Pipe Wrench | For tightening and securing fittings |
| Drill | To create mounting holes |
| Level | To ensure the indoor and outdoor units are mounted correctly |
Equipping yourself with the right skills and tools is vital in successfully installing a mini split system. If you find yourself lacking in any area, reconsider the DIY route and think about hiring a licensed professional to ensure everything is installed safely and efficiently.
Step-by-Step Guide for DIY Mini Split Installation
Installing a mini split system can be a rewarding project for homeowners looking to enhance their comfort without the complications of central air conditioning. However, it’s vital to approach this task with caution. This step-by-step guide will help you navigate through the installation process while highlighting crucial considerations.
1. Gather Necessary Tools
Before starting your installation, ensure you have the following tools ready:
- Drill
- Level
- Wrench set
- Pipe cutter
- Measuring tape
- Screwdriver
- Vacuum pump
2. Choose the Right Location
Deciding on the right spot to mount the indoor and outdoor units is crucial. You want to ensure:
- Proper airflow for the indoor unit
- A stable, level surface for the outdoor unit
- Minimal obstructions between the two units
3. Install the Indoor Unit
Follow these steps to install the indoor unit:
- Use the level to mark a line where you will install the indoor unit.
- Drill a hole through the wall for refrigerant lines and wiring.
- Secure the mounting bracket to the wall.
- Hang the indoor unit on the bracket.
4. Install the Outdoor Unit
Next, install the outdoor unit by:
- Placing it on a level, stable surface.
- Making sure it’s positioned away from direct sunlight and strong winds.
- Connecting the refrigerant lines and power supply from the indoor unit to the outdoor unit.
5. Connect Refrigerant Lines
Take care when connecting the refrigerant lines. Use the pipe cutter to cut them to the necessary length, then use the wrench to tighten them securely.
6. Test the System
After completing the installation, it’s essential to conduct a test run of the system. This will ensure everything is functioning correctly and help identify any potential leaks or issues.
Remember, while a DIY approach can save you money, it’s crucial to understand if you’re capable of completing the installation properly. Always follow manufacturer instructions and consider consulting a professional if you encounter difficulties. Your comfort depends on a successful and safe installation.
By following this step-by-step guide, you can enjoy the benefits of your new mini s
Common Mistakes to Avoid During Installation
Installing a mini split system can be a rewarding project, but it’s essential to approach it with caution. Common mistakes can lead to inefficiencies, increased costs, and even damage to your system. Here are several critical errors to steer clear of during your installation process.
One major mistake is improper placement of the indoor and outdoor units. It’s vital to choose locations that allow for maximum airflow and minimal obstructions. Ensure that the indoor unit is positioned where it can effectively circulate air without being blocked by furniture or walls. The outdoor unit should be placed in a location that is free from debris and provides adequate airflow.
Another common error is neglecting to follow the manufacturer’s guidelines. Each mini split system comes with specific instructions regarding installation, including recommended clearances, electrical requirements, and piping lengths. Skipping over these details can lead to operational issues and might void your warranty. Always read the manual thoroughly before starting the installation.
Additionally, many DIY installers tend to underestimate the importance of proper insulation and sealing of the lines. Inadequate insulation can cause significant energy losses, making your system less efficient and increasing your energy bills. Ensure that all refrigerant lines are well-insulated and that any gaps or holes created during installation are properly sealed to prevent air leaks.
| Common Mistakes | Consequences |
|---|---|
| Improper Placement | Reduced efficiency & airflow issues |
| Ignoring Manufacturer Guidelines | Operational issues & voided warranty |
| Poor Insulation & Sealing | Increased energy bills & reduced performance |
Benefits and Risks of DIY Mini Split Installation
Installing a mini split air conditioning system can be a rewarding project, but it’s essential to weigh the benefits and risks before diving into the installation process. Understanding these factors can help you make an informed decision as to whether this is a task you can handle yourself or if you should consider hiring a professional.
One of the major benefits of DIY mini split installation is the potential cost savings. By opting to install the system yourself, you can save significantly on labor costs. Additionally, many mini split systems come with clear instructions that simplify the installation process. This not only empowers DIY enthusiasts but also provides a sense of satisfaction once the system is successfully installed.
However, it’s important to consider the risks involved. Poor installation can lead to decreased efficiency, which may result in higher energy bills or even the need for expensive repairs. Moreover, some systems require proper electrical work or refrigerant handling, which may be beyond the scope of an average DIYer. In some cases, improperly installed units can void warranties, adding to potential future costs.
| Benefits | Risks |
|---|---|
| Cost savings | Increased energy bills |
| Satisfaction from completing the project | Void warranty |
| Available instructional resources | Potential for improper installation |
Ultimately, while the prospect of installing a mini split system yourself is enticing, it’s crucial to evaluate your skills and the complexity of the installation. Make sure to consider both the
Frequently Asked Questions
What is a mini split system?
A mini split system is a type of heating and cooling system that consists of an outdoor compressor and one or more indoor air-handling units.
Can I install a mini split system myself?
While it is possible to install a mini split system yourself, it is recommended to have a professional do it, especially for refrigerant handling and electrical work, to ensure safety and proper installation.
What tools do I need to install a mini split system?
You will need basic tools such as a drill, wrenches, screwdrivers, and a vacuum pump, along with specific tools for refrigerant charging if you are handling that process.
What are the benefits of a mini split system?
Mini split systems offer energy efficiency, flexibility in installation, quiet operation, and the ability to control the temperature in individual rooms.
Are there any permits required for installing a mini split?
Permit requirements vary by location, so it’s essential to check with your local regulations before installing a mini split system.
How much does it typically cost to install a mini split system?
The cost can vary widely based on the brand, size, and complexity of the installation, but DIY installations might save on labor costs.
What common mistakes should I avoid when installing a mini split?
Common mistakes include inadequate insulation, improper placement of indoor units, neglecting to plant outdoor units in a suitable location, and failing to properly connect refrigerant lines.
