Learn the essentials of mini split installation, including assessment, location selection, and a detailed step-by-step guide to ensure optimal performance.Are you considering installing a mini-split air conditioning system in your home but wondering if it’s a task you can tackle yourself? You’re not alone! Many homeowners are drawn to the idea of DIY mini-split installation for its potential cost savings and the satisfaction of completing a project. However, taking the DIY route requires careful planning and understanding of the installation process. In this blog post, we’ll cover the essential aspects of mini-split installation, from the basics of how these systems work to assessing your home’s specific needs. We’ll guide you through choosing the right location for optimal efficiency, gathering necessary tools, and provide a step-by-step installation guide to help you make an informed decision. Whether you’re a seasoned DIY enthusiast or a first-time installer, this comprehensive guide will empower you to take on the challenge!
Mini Split Installation Basics
Installing a mini split air conditioning system can seem daunting, but with the right knowledge and preparation, it can be a rewarding DIY project. Understanding the basics of mini split installation is essential for anyone considering this efficient cooling (and heating) solution for their home.
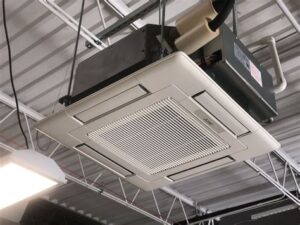
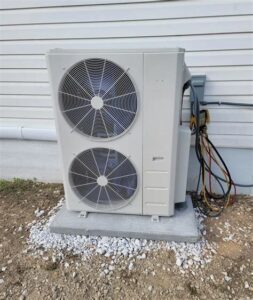
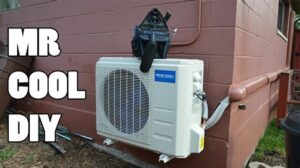
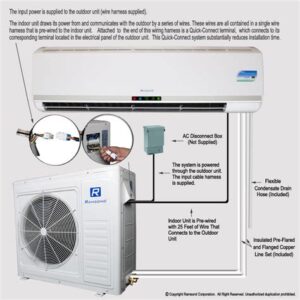
A mini split system consists of two main components: an indoor unit and an outdoor unit. The indoor unit is responsible for delivering cool air to your living space, while the outdoor unit is tasked with processing and expelling heat. This divided system allows for a more flexible installation, as you can place the indoor unit in a location that optimally cools your space.
Before you start your installation project, it’s important to consider your home’s specific needs. This involves assessing the square footage of the area you want to cool and understanding how many units you’ll need to achieve effective temperature control. Installing multiple units may require you to understand the concept of multi-zone systems. Additionally, ensure you have planned for electrical requirements and have access to necessary tools.
| Component | Function |
|---|---|
| Indoor Unit | Delivers cool air to the indoor environment |
| Outdoor Unit | Processes and expels heat from the indoor air |
Assessing Your Home’s Needs
Before embarking on the journey of installing a mini-split system, it is crucial to thoroughly assess your home’s needs. This step ensures that you choose the right system tailored to your specific requirements, leading to greater efficiency and comfort.
First, consider the size of the area you intend to cool or heat. The space’s square footage will directly influence the cooling capacity required from your mini-split system. You can use tools like a BTU calculator to determine the appropriate capacity needed for your room. Remember to factor in the height of the ceilings and the presence of any large windows, as these can also affect the efficiency of the system.
Another important aspect is evaluating the insulation of your home. Well-insulated spaces will retain conditioned air more effectively, allowing for a smaller system to be sufficient. Check for drafts around windows and doors, and consider how many exterior walls your space has, as all these factors can significantly affect the overall performance of your mini-split unit.
Remember, understanding your home’s unique requirements can save you time and money in the long run.
Additionally, think about the layout of your living space. Open floor plans may require multiple indoor units for even temperature distribution, whereas a compact layout may only need one. Take note of any barriers such as walls or furniture that might impede airflow, and plan accordingly for optimal placement.
Choosing the Right Location
When it comes to mini split installation, choosing the right location for the indoor and outdoor units is paramount for optimal performance and efficiency. The placement can significantly influence the system’s ability to heat or cool your space effectively. Here are some key considerations to help you determine the best spots:
- Indoor Unit Placement: The indoor unit should be positioned in a way that promotes even air distribution. Avoid placing it in corners or behind obstructions like furniture or curtains.
- Outdoor Unit Placement: Ensure the outdoor unit has sufficient airflow. Position it away from any debris and ensure it is elevated above snow levels in colder regions.
- Distance Between Units: Keep the indoor and outdoor units within the manufacturer’s recommended distance to enhance efficiency and minimize refrigerant loss.
Additionally, consider the following factors while selecting the location:
- Electrical Access: Ensure there is easy access to electrical connections and consider the length of the electrical line.
- Maintenance Accessibility: Ensure both units are accessible for regular maintenance and servicing.
- Aesthetic Considerations: Consider how the units will affect your space’s aesthetics. Choosing a discreet location can help maintain visual appeal.
By carefully evaluating these aspects, you’ll be better positioned to achieve a successful mini split installation. The right location not only maximizes the effectiveness of the system but also enhances the comfort of your living environment.
Gathering Tools and Materials
Before embarking on your journey to install a mini-split system, it is crucial to gather all the necessary tools and materials. Having everything on hand will streamline the process and reduce frustration during the installation. Below is a list of essential items that you will need:
- Refrigerant Line Set – This is essential for connecting the indoor and outdoor units.
- Electrical Wiring – Ensure you have the correct gauge for your system.
- Drain Line – This is necessary for removing condensation from the indoor unit.
- Wall Bracket or Mounting Pad – Used for securely mounting the outdoor unit.
- Fasteners and Anchors – For attaching the units firmly to the wall or the ground.
- Insulation Tape – To insulate the refrigerant line, preventing energy loss.
- Leveling Tool – Essential for ensuring that your units are installed perfectly horizontally and vertically.
- Drill with Bits – Needed to create holes for mounting, wiring, and draining.
- Tube Cutter – To cut the refrigerant lines to the desired length.
- Socket Wrench Set – For tightening connections.
Gather these tools and materials ahead of time to prepare for a smooth installation. It’s also advisable to check local building codes, as certain permits or inspections might be required depending on your area.
Additionally, ensure you have safety gear, including gloves and goggles, as the installation process can involve sharp objects and potentially hazardous materials. Preparing adequately before you start will promote a safer and more efficient installation.
By having the right tools and materials, you can tackle the installation of your mini-split system with confidence. Being organized and well-prepared will help you stay on track as you work through each step of the installation process.
Step-by-Step Installation Guide
Installing a mini split system can seem daunting, but with the right approach, it can be a manageable project for those with some DIY experience. This step-by-step guide will walk you through the essential stages of installation, ensuring your new system operates efficiently.
Step 1: Read the Manual – Before beginning, familiarize yourself with the installation manual that comes with your mini split unit. Understanding the components and specifications will save you time during the installation process.
Step 2: Prepare the Area – Choose a suitable location for both the indoor and outdoor units. Ensure there is enough space for airflow and maintenance. Clear the area of any obstructions that may hinder installation.
Step 3: Gather Your Tools – You will need several tools for the installation. Here’s a basic list:
- Drill
- Level
- Pipe cutter
- Wrench set
- Safety glasses
- Measuring tape
Step 4: Install the Indoor Unit – Mount the indoor unit on the wall bracket, ensuring it’s level. Use the provided brackets and screws to secure it in place.
Step 5: Connect the Refrigerant Lines – Carefully connect the refrigerant lines from the indoor unit to the outdoor unit according to the manufacturer’s instructions. Make sure to tighten all connections to prevent leaks.
Step 6: Drill a Hole for the Lines – If you need to run the refrigerant lines through the wall, use a drill to create an opening. This hole should be slightly larger than the lines to facilitate installation.
Step 7: Install the Outdoor Unit – Position the outdoor unit on a level surface, ensuring it is stable. Connect the power supply as outlined in the electrical manual.
Step 8: Final Checks – Once everything is connected, check for any loose fittings or leaks. Use a vacuum pump to remove air from the system before charging it with refrigerant.
Step 9: Test the System – Turn on the unit and test its functionality. Monitor the system for any unusual noises or issues during operation.
Following these step-by-step instructions, you can successfully install a mini split system in your home. While the process is straightforward, remember that consulting with a professional is advisable if you encounter any difficulties or if installation regulations require it.
Frequently Asked Questions
What is a mini split system?
A mini split system is a type of heating and cooling system that consists of an outdoor unit and one or more indoor units, providing energy-efficient temperature control for individual rooms or zones.
Is it legal to install a mini split myself?
The legality of DIY installation varies by location. Some areas require a licensed professional for HVAC installations due to safety and regulatory standards.
What tools do I need to install a mini split?
Essential tools for installing a mini split include a drill, studs finder, level, wrenches, a pipe cutter, and a vacuum pump, among others.
What are some common challenges when installing a mini split?
Common challenges include finding suitable locations for indoor units, properly sealing refrigerant lines, and ensuring electrical connections are safe and up to code.
Do I need a specific permit to install a mini split?
Yes, many locations require permits for HVAC installations, so it’s best to check with your local building authority before proceeding with a DIY installation.
What safety measures should I take during installation?
Safety measures include turning off power to the area, using protective gear, ensuring proper ventilation, and being cautious with refrigerants and electrical components.
Is it worth hiring a professional instead of installing it myself?
While DIY installation can save money, hiring a professional may ensure proper installation, compliance with codes, and support for future maintenance or repairs.
