Explore the essentials of mini split systems, from assessing your needs and selecting the right unit to installation tips and DIY benefits.If you’re considering upgrading your home’s heating and cooling system, you might have wondered, “Can I install my own mini split?” Mini split systems are a popular choice for their efficiency and versatility, but they can seem intimidating to install. In this blog post, we’ll explore everything you need to know about mini split systems, starting with an overview of how they work and what they can do for your home. From assessing your home’s specific needs to selecting the right unit for your space, we’ll guide you through the decision-making process. Additionally, we’ll provide essential installation guidelines and discuss the benefits of taking on this DIY project yourself. Whether you’re a seasoned DIYer or a newbie, this post will equip you with the knowledge you need to tackle your mini split installation confidently.
Understanding Mini Split Systems
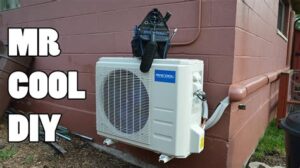
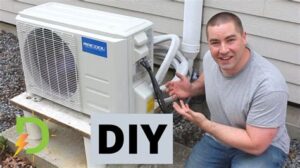
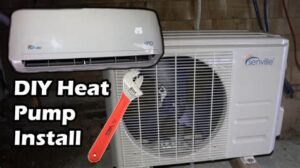
A mini split system is an energy-efficient heating and cooling solution that consists of two main components: an indoor unit and an outdoor unit. Unlike traditional HVAC systems that require ductwork, mini splits operate using refrigerant lines to transfer heat between the indoor and outdoor units. This makes them particularly effective for homes lacking ductwork or for homeowners looking to improve energy efficiency.
Mini split systems come in various models that can accommodate different heating and cooling needs. They offer multiple zones of temperature control, allowing you to manage the climate of separate rooms or areas within your home efficiently. Additionally, many units come equipped with features such as programmable thermostats, quiet operation, and energy-saving modes, making them more convenient and cost-effective.
When considering a mini split system for your home, it is crucial to assess the overall layout and specific climate needs. This includes understanding the total square footage you wish to heat or cool, insulation levels, and local weather conditions. By carefully evaluating these factors, you can make an informed decision that best meets your home’s needs.
Assessing Your Home’s Needs
When considering whether to install a mini split system, the first step is to assess your home’s needs. Understanding the unique characteristics of your living space is crucial in making an informed decision.
Several factors come into play here, such as the size of the area you want to cool or heat, the insulation quality of your home, and the local climate. For instance, larger spaces may require multiple units or a higher capacity system to ensure effective temperature control.
Additionally, it’s important to evaluate the layout of your home. Open-concept spaces might have different ventilation needs compared to smaller, sectioned rooms. By accurately assessing these elements, you can select a mini split unit that best fits your personal comfort, energy efficiency, and overall performance needs.
For a more structured approach, consider creating a checklist that includes:
- Room dimensions (length, width, and height)
- Sun exposure (direct sunlight can increase cooling needs)
- Existing heating and cooling sources
- Insulation types and conditions
By taking these considerations into account, you are positioning yourself to make a choice that meets your home’s specific heating and cooling requirements effectively.
Selecting the Right Unit
Choosing the right mini split unit is crucial for ensuring optimal performance and comfort within your home. With various models available on the market, it can be overwhelming to determine which one fits your specific needs. Here are some key factors to consider when selecting your unit:
- Capacity: The capacity of the unit is measured in BTUs (British Thermal Units). It’s important to choose a unit with the right BTU rating for your room size. A unit that is too small will struggle to cool or heat the space, while a unit that is too large may cycle on and off too frequently.
- Energy Efficiency: Look for units with high SEER (Seasonal Energy Efficiency Ratio) ratings. Higher efficiency means lower energy bills and a smaller carbon footprint.
- Noise Level: Consider the noise rating of the indoor and outdoor units. A quieter system will contribute to a more comfortable living environment, especially for bedrooms or home offices.
“The right unit can make a significant difference in your comfort and energy costs.”
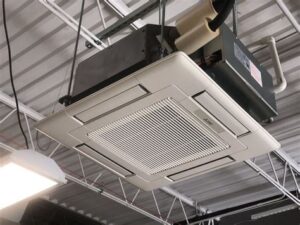
Additionally, it is important to think about the configuration of the unit. Mini splits come in various styles, including wall-mounted, floor-mounted, and ceiling-mounted options. Choose a configuration that complements your space and offers the best air distribution.
Lastly, don’t forget to consider any features that may enhance convenience, such as remote controls, programmable timers, and smart home compatibility. Investing in a unit with these enhancements can provide you with added comfort and control over your indoor climate.
Guidelines for Installation
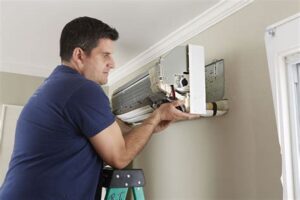
Installing a mini split system can be a straightforward process, however, there are several guidelines you should follow to ensure a successful installation. This system typically consists of an outdoor compressor unit and one or more indoor air-handling units.
Before diving into the installation, make sure you have the right tools on hand. Here is a list of essential tools for your mini split installation:
- Drill and drill bits
- Level
- Wrenches
- Copper tubing cutter
- Refrigerant gauge set
Here are some critical installation guidelines to follow:
- Select the right location: Ensure that both the indoor and outdoor units are placed in areas that provide proper air circulation and access.
- Follow the manufacturer’s directions: Review the installation manual that comes with the unit, as it contains vital information specific to your model.
- Maintain adequate clearance: Make sure to have sufficient space around the units to facilitate airflow and maintenance.
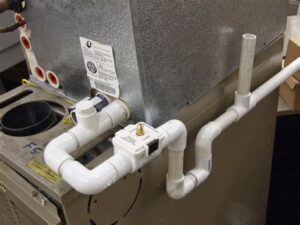
- Insulate properly: Use insulation on the refrigerant lines and drain line to prevent condensation.
- Double-check electrical connections: Ensure all electrical connections are secure and meet local building codes.
Lastly, always prioritize safety during installation. If you encounter any complex issues, it’s advisable to consult with a professional. Installing your own mini split system can be rewarding, but ensuring you follow these installation guidelines will help you avoid common pitfalls and ensure your system operates efficiently.
Benefits of DIY Installation
Installing a mini split system can be a rewarding project for homeowners willing to take on a bit of work. One of the primary benefits of DIY installation is significant cost savings. By opting to install the system yourself, you can circumvent expensive labor charges typically incurred when hiring professionals.
Additionally, completing the installation on your own allows you to gain valuable knowledge and understanding of how the system works. This hands-on experience can prove invaluable when it comes to future maintenance, repairs, or upgrades. Being intimately familiar with your unit can help you address minor issues before they escalate into major problems.
Moreover, DIY installation gives you the flexibility to tailor the setup to your specific needs and preferences. You can choose the optimal placement for the indoor and outdoor units based on your unique space, ensuring maximum efficiency. This level of customization is often harder to achieve when relying on external contractors.
In summary, the benefits of DIY installation for a mini split system include significant cost savings, increased knowledge of your home’s HVAC system, and the ability to customize the installation to best suit your needs.
Frequently Asked Questions
What tools do I need to install my own mini split system?
To install your own mini split system, you’ll need basic tools such as a drill, wrenches, screwdrivers, a level, a stud finder, and possibly a vacuum pump and manifold gauge set for handling refrigerants.
Is it legal to install a mini split system myself?
The legality of self-installation varies by location. In some areas, you may need a licensed HVAC technician to perform the installation or at least to handle refrigerant connections.
What are the steps involved in installing a mini split system?
Key steps include selecting the right location for both indoor and outdoor units, mounting the units, connecting refrigerant lines, electrical wiring, and testing the system for leaks.
What are the safety precautions when installing a mini split?
Safety precautions include wearing appropriate personal protective equipment, ensuring the power supply is turned off during installation, and properly handling refrigerants to avoid exposure.
Can I do the electrical work for my mini split installation?
While some homeowners with electrical knowledge may do the wiring, it’s often recommended to hire a qualified electrician to ensure safety and compliance with local codes.
What are common mistakes to avoid while installing a mini split?
Common mistakes include incorrectly sizing the system, improper placement of indoor units, neglecting proper sealing of refrigerant lines, and not following the manufacturer’s installation guidelines.
How can I ensure my mini split installation is efficient?
To ensure efficiency, make sure to correctly size your unit, install it in a location that allows for optimal airflow, properly seal any connections, and maintain regular cleaning and servicing.
