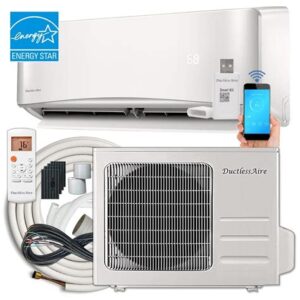
Master DIY mini split installation with our guide on skills assessment, system selection, electrical work, permits, and the complete installation process.Are you contemplating a DIY approach to installing a mini split air conditioning system in your home? It’s a great way to save on installation costs and take control of your home climate comfort. However, diving into this project without proper understanding and preparation can lead to costly mistakes. Before you grab your tools, consider your DIY skills and whether you’re equipped to handle both the technical and mechanical aspects of the installation. In this guide, we’ll explore the essential steps, from choosing the right mini split system to understanding the electrical and refrigerant work involved. Additionally, we’ll cover the necessary permits and approvals you need to avoid legal issues. Finally, we’ll walk you through the entire installation process to ensure you’re fully prepared for this rewarding project. Let’s get started on making your home cool and comfortable!
Assessing your DIY skills
When considering whether you can install a mini split system yourself, the first step is to accurately assess your DIY skills. This involves evaluating your current knowledge and experience with home improvement projects, specifically regarding HVAC systems. Are you familiar with basic plumbing, electrical work, and refrigerant handling? Understanding your comfort level with these tasks is crucial before diving into a project that could potentially affect your home’s climate control and energy efficiency.
To help gauge your capabilities, consider the following aspects:
- Experience: Have you completed similar projects before? Successful installations of other systems or appliances can be a good indicator of your proficiency.
- Knowledge: Do you understand the principles behind how a mini split system works? Familiarity with terms like evaporators, condensers, and refrigerants will aid in the installation process.
- Tools: Do you have the necessary tools for the job? Installing a mini split system may require specialized tools that not every DIY enthusiast possesses.
Ultimately, the decision to proceed with a DIY installation should be made with careful consideration of your skills and any potential risks involved. If you feel confident and are willing to undergo the learning process, self-installation could be a rewarding endeavor. However, if you’re uncertain, hiring a professional might save you time and frustration in the long run.
Choosing the right mini split system
When it comes to selecting the right mini split system, there are several key factors to consider to ensure you make an informed decision. A mini split system not only provides heating and cooling but also offers energy efficiency in comparison to traditional HVAC systems. Below are some important considerations when choosing the perfect unit for your needs:
- Capacity: The capacity of the mini split system is measured in BTUs (British Thermal Units). It’s essential to choose a system that matches the size of the area you plan to heat or cool. A unit that is too small won’t adequately condition the space, while one that is too large can lead to inefficient operation.
- Features: Modern mini split systems come with various features. Look for options like programmable thermostats, remote controls, and energy-saving modes. These features can enhance your comfort and reduce energy costs.
- Efficiency Ratings: Evaluate the system’s SEER (Seasonal Energy Efficiency Ratio) and HSPF (Heating Seasonal Performance Factor) ratings. Higher ratings indicate better energy efficiency, which can save you a significant amount on your utility bills over time.
- Brand Reputation: Research different brands and models to assess their reliability and customer satisfaction. Reading reviews can assist in ensuring that you invest in a quality product.
Furthermore, consider whether you want a single-zone system for a specific area or a multi-zone system to heat and cool multiple rooms. Make sure to account for the layout of your home and the best placement for the indoor and outdoor units.
Lastly, consult with an HVAC professional if you’re unsure about any part of the process. They can provide valuable insights into the right mini split system for your specific needs, ensuring that you make a choice that balances efficiency, performance, and cost.
By taking the time to evaluate these factors, you can make an informed decision
Understanding electrical and refrigerant work
When considering a mini split installation, understanding electrical work and refrigerant handling is crucial. These are two significant aspects that can greatly impact the success of the project and your safety. Let’s delve into what is involved in these areas.
First, let’s talk about the electrical work needed for your mini split system. A reliable power source is essential for the unit to function effectively. It often requires a dedicated circuit, which may necessitate the involvement of a qualified electrician to ensure compliance with local electrical codes. Here are some key considerations:
- Confirm the voltage and amperage requirements for your specific mini split system.
- Install an appropriate breaker in your electrical panel.
- Use the correct gauge wire to connect the outdoor and indoor units.
Next, understanding refrigerant work is equally important. Proper handling of refrigerants is vital to ensure the efficiency and longevity of your mini split system. Incorrect installation can lead to leaks, which can be harmful to both the environment and individuals. Here’s what you need to know:
- Always follow the manufacturer’s guidelines for refrigerant type and amount.
- Consider using vacuum pumps to remove air and moisture from the lines before charging your system.
- Ensure you have the right tools, such as manifold gauges, to monitor the refrigerant pressure accurately.
In summary, while attempting the installation of a mini split system yourself can be rewarding, ensuring you have a solid understanding of both electrical and refrigerant work is imperative. It can not only s
Obtaining necessary permits and approvals
When considering the installation of a mini split system, it’s crucial to understand that obtaining the necessary permits and approvals is a critical step in the process. Failing to do so could lead to costly fines, project delays, or complications when selling your home.
Before starting your installation, check with your local building department to identify what permits are required for HVAC installations in your area. Usually, this involves a simple application process, and local authorities often outline the necessary documentation that you’ll need to provide.
It’s also wise to consult your homeowner’s association (HOA) if applicable. Some neighborhoods have specific regulations regarding exterior modifications, including the installation of mini split units. By following these protocols, you’ll ensure that your installation is compliant and safe.
In addition to formal permits, consider scheduling an inspection once your installation is completed. This step can verify that everything meets safety standards and that you are compliant with local building codes.
Completing the installation process
After carefully assessing your DIY skills, selecting the right mini split system, and understanding the necessary electrical and refrigerant work, it’s time to move on to the crucial step of completing the installation process. This phase involves several important tasks that ensure your mini split system operates efficiently and safely.
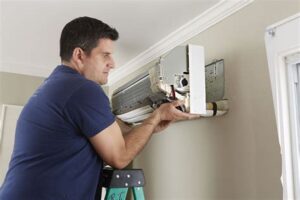
The first step in the installation process is to mount the indoor unit. This typically involves the following steps:
- Choosing a location that allows for efficient airflow and convenience.
- Using a level to ensure the unit is straight and properly aligned.
- Drilling holes for the mounting bracket and securing it to the wall.
Next, you’ll need to connect the refrigerant lines and the drain line from the indoor unit to the outdoor unit. Make sure to:
- Insulate the refrigerant lines to avoid energy loss.
- Carefully handle the line sets to prevent leaks.
- Ensure the drain line slopes downward to facilitate proper drainage.
Once those connections are made, it’s crucial to test the system for any leaks. This usually involves:
Using a vacuum pump to remove any air and moisture from the refrigerant lines, followed by charging the system with refrigerant as per the manufacturer’s specifications.
Finally, double-check all electrical connections, turn on the system, and test it to ensure it operates correctly. Keep an eye on the temperature and listen for any unusual noises that might indicate a problem.
Frequently Asked Questions
What is a mini split system?
A mini split system is a type of air conditioning system that consists of an outdoor compressor and one or more indoor air-handling units, allowing for efficient heating and cooling without the need for ductwork.
Is it possible to install a mini split system by myself?
While it is technically possible to install a mini split system yourself, it requires knowledge of HVAC systems, electrical work, and local building codes. Many people choose to hire professionals for safety and compliance reasons.
What tools do I need to install a mini split system?
To install a mini split system, you will typically need basic tools such as a drill, wrenches, screwdrivers, refrigerant gauges, vacuum pump, and possibly a ladder for outdoor unit placement.
What are the potential risks of installing a mini split system myself?
The potential risks include improper installation, which can lead to system inefficiency, refrigerant leaks, electrical issues, or even voiding the warranty on the equipment.
Are there any permits needed to install a mini split system?
Yes, in many areas, you will need to obtain permits and comply with local building codes when installing a mini split system. It’s best to check with your local authorities.
How long does it take to install a mini split system?
When done by professionals, installing a mini split system usually takes between 4 to 8 hours, depending on the complexity and the number of indoor units. DIY installations may take longer if you are inexperienced.
What are the benefits of hiring a professional to install my mini split?
Hiring a professional ensures that the installation is done correctly and safely, improves efficiency, and provides peace of mind. Professionals also typically offer warranties on their work.
