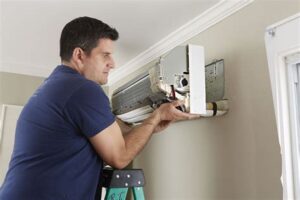
Learn to install mini split systems with our comprehensive guide on understanding their workings, local building codes, unit selection, tools, and installation instructions.Are you considering installing a mini split air conditioning system in your home? While DIY projects can be rewarding, it’s essential to weigh the pros and cons of tackling such a task on your own. Mini split systems are known for their energy efficiency and ability to provide both heating and cooling, making them an attractive option for many households. However, before you dive into installation, it’s crucial to understand the ins and outs of these systems, be aware of local building codes, and choose the right unit for your space. Gathering the necessary tools and materials and following installation instructions meticulously will ensure a successful setup. In this blog post, we will guide you through these critical steps, empowering you to make an informed decision about whether you can confidently install a mini split system yourself.
Understanding Mini Split Systems
A mini split system is a revolutionary air conditioning and heating solution that provides superior climate control for individual rooms or zones. Unlike traditional HVAC systems, mini splits do not require ducts, which can lead to significant energy loss. This makes them a great choice for homes without existing ductwork or for those looking to improve energy efficiency.
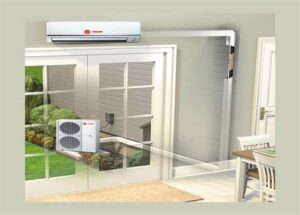
The main components of a mini split system include an indoor unit, an outdoor unit, and a refrigerant line that connects the two. The indoor unit is responsible for distributing conditioned air within the room, while the outdoor unit houses the compressor and condenser. This separation allows for quiet operation indoors, making mini splits ideal for bedrooms, home offices, and other living spaces.
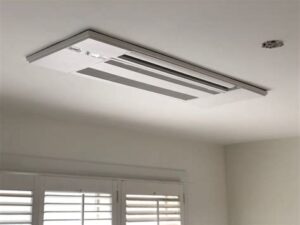
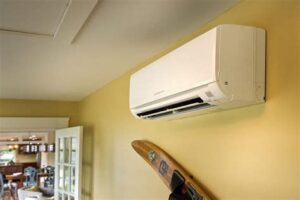
Mini split systems are known for their high efficiency and flexible installation options. They can be mounted on walls, ceilings, or even floor-standing, making them versatile for any room layout. Additionally, many models come with inverter technology, which enables them to adjust their speed according to the desired temperature, further enhancing energy savings.
Researching Local Building Codes
Before you consider installing a mini split system, it’s crucial to begin with researching local building codes. Different regions have unique regulations that govern the installation of heating and cooling systems. Many municipalities require permits for such installations, and failure to comply can result in fines or even mandatory removal of the system.
Start your research by contacting your local building department. You can typically find information on their website or by visiting their office in person. Look for specific codes relating to HVAC installations, as they will provide guidance on installation requirements, safety measures, and any necessary inspections that must occur during and after the installation process.
Additionally, some homeowners’ associations may have specific restrictions on equipment visible from the outside. Always check with them as well to ensure that your mini split unit adheres to all aesthetic or operational guidelines put forth by the community.
Selecting the Right Unit
When it comes to selecting the right unit for your mini split system, there are several factors to consider that can impact both the efficiency and comfort of your space. Understanding the capacity requirements, the type of system you need, and the features available will guide you in making an informed decision.
First, you’ll want to determine the appropriate BTU (British Thermal Unit) rating for your room. Generally, larger spaces require units with higher BTU ratings. To simplify, here is a basic table to help you choose:
| Room Size (Sq. Ft.) | Recommended BTU |
|---|---|
| 150 – 250 | 6,000 – 8,000 |
| 250 – 400 | 8,000 – 12,000 |
| 400 – 600 | 12,000 – 18,000 |
| 600 – 1,000 | 18,000 – 36,000 |
Additionally, consider the type of mini split system that best suits your needs—whether it be a single-zone or multi-zone system. Single-zone systems are effective for temperature control in one area, while multi-zone units allow for independent temperature settings in multiple rooms. Features such as inverter technology, smart controls, and energy efficiency ratings are also essential to evaluate when selecting your unit.
Gathering Necessary Tools and Materials
When it comes to installing a mini split system, one of the most crucial steps is gathering the necessary tools and materials. Failing to have the right equipment on hand can lead to delays and complications during the installation process. Below is a checklist of items you will likely need to complete your mini split installation:
| Tool/Material | Description |
|---|---|
| Drill | A power drill is essential for creating holes in walls or ceilings for mounting brackets and pipe access. |
| Stud Finder | This tool helps to locate studs in walls to safely mount the indoor unit. |
| Pipe Wrench | Used for tightening and loosening the refrigerant lines. |
| Level | A level ensures that your units are installed straight and secure. |
| Vacuum Pump | Necessary for creating a vacuum in the refrigeration system before adding refrigerant. |
| Refrigerant | Make sure to obtain the correct type and amount of refrigerant needed for your system. |
| Insulation Tape | Used to insulate refrigerant lines to prevent inefficiency. |
In addition to tools, you’ll need certain materials for the installation. These typically include mounting brackets, refrigeration lines, drain line, and electrical wiring. Make sure to check your mini split system’s installation manual for any specific materials required for your chosen unit.
Having a comprehensive list prior to starting the installation will not only streamline the process but also mitigate the risk of oversights. Prepare your tools and materials in advance for a successful installation!
Following Installation Instructions
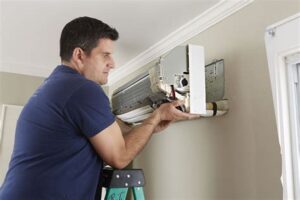
Once you have selected the appropriate mini split unit and gathered the necessary tools, it is crucial to follow the installation instructions meticulously. Each manufacturer provides a detailed installation guide that includes specific steps tailored to their product. Adhering to these instructions not only ensures a successful installation but also helps maintain the warranty on your unit.
Typically, the installation process involves several key steps. First, you should read through the entire installation manual before beginning. Then, prepare the installation site by ensuring that all necessary tools and materials are at hand. This preparation can greatly reduce the risk of making mistakes during the installation.
When installing a mini split system, you will often need to ensure proper electrical connections, refrigerant lines, and drainage for condensation. Pay close attention to the instructions regarding the placement of the indoor and outdoor units. Improper placement can lead to inefficiencies and system failures. Also, remember to check for local building codes to ensure compliance while following the instructions step by step.
Frequently Asked Questions
What is a mini-split system?
A mini-split system is a type of ductless air conditioning and heating system that provides individual temperature control for different rooms or zones in a home.
Can I install a mini-split system myself?
While it is possible to install a mini-split system yourself, it is recommended to hire a professional to ensure proper installation, especially for electrical and refrigerant line work.
What tools are required for a DIY mini-split installation?
Basic tools needed for a DIY installation include a drill, level, measuring tape, wrenches, and screwdrivers. Additionally, you may need specialized tools for handling refrigerant.
What are the steps to install a mini-split system?
Steps typically include selecting the right location, mounting the indoor and outdoor units, connecting refrigerant lines, providing drainage, and wiring the electrical components.
Are there any permits needed for my mini-split installation?
Yes, many local governments require permits for HVAC installations. Always check with your local building authority before proceeding.
What are the common mistakes to avoid when installing a mini-split system?
Common mistakes include improper sizing of the system, incorrect refrigerant handling, poor drainage setup, and inadequate electrical connections.
How can I tell if my mini-split installation is successful?
You can tell if your installation is successful by checking for proper airflow, ensuring the system heats or cools as expected, and verifying there are no unusual noises or leaks.
