Can a Mini Split Be Installed on an Inside Wall

Discover how to choose the perfect location, assess structural integrity, and install a mini split unit with expert tips and contractor insights.When it comes to heating and cooling your space efficiently, mini-split systems offer a versatile and effective solution. One common question many homeowners grapple with is whether these units can be installed on an inside wall. This blog post will explore this topic in depth, guiding you through the essential steps and considerations for a successful installation. From choosing the right location within your home to assessing the structural integrity of the wall, we’ll cover everything you need to know. Additionally, we will discuss the importance of working with qualified ductless HVAC contractors to ensure a seamless installation process. Finally, we will delve into the crucial steps of sealing and insulating the wall opening to maximize efficiency. Whether you’re renovating or just looking to improve your home’s climate control, this guide will provide valuable insights for your mini-split project.

Choosing the Right Location

When it comes to installing a mini split system, one of the most critical decisions you’ll need to make is choosing the right location for the indoor unit. The positioning plays a significant role in the efficiency of the system, and finding the ideal spot can enhance air distribution and ensure optimal performance.

First and foremost, consider the airflow. The chosen location should allow for adequate airflow throughout the room. Avoid placing the unit behind furniture or near obstructions that might block the air from circulating freely. A clear pathway is essential for both heating and cooling functions.

Secondly, think about the size and layout of the room. The indoor unit should be installed on an interior wall that provides the best access to the areas that need temperature control. Ideally, the mini split should be located approximately 7-8 feet from the floor to maximize efficiency.

Lastly, consider the overall aesthetics of the installation. The unit will be a visible part of your interior decor, so it’s worth taking a moment to evaluate how it will blend with your room’s design. An inconspicuous location can make a significant difference in not only functionality but also in maintaining your home’s visual appeal.

Assessing Structural Integrity

When considering the installation of a mini split unit on an inside wall, one of the key factors to evaluate is the structural integrity of that wall. Proper assessment ensures that the wall can support the weight of the mini split system and maintain a safe and effective installation.

It is imperative to examine aspects such as the material of the wall, its thickness, and any existing load-bearing features. Walls made of concrete, brick, or reinforced drywall offer greater support compared to standard gypsum board. Additionally, understanding how the wall interacts with the overall building structure will help determine if reinforcement is necessary.

Another important consideration is the location of electrical wiring and plumbing within the wall. Prior to drilling any holes or attaching mounts, make sure to locate potential hazards that could compromise the wall’s integrity or lead to additional repair costs down the line.

In summary, taking the time to properly assess the structural integrity of the wall will not only ensure the successful installation of a mini split unit but will also enhance its longevity and performance.

Working with Ductless HVAC Contractors

When it comes to installing a mini split system, working with ductless HVAC contractors is critical to ensuring a successful project. These professionals possess the expertise and knowledge necessary to navigate the complexities of installation, which can often include local building codes and regulations. Choosing a qualified contractor can save you from headaches in the future and guarantee that your new system operates efficiently.

First, it’s essential to conduct thorough research when selecting the right ductless HVAC contractor. Look for licensed professionals with extensive experience in installing mini split systems. Customer reviews and testimonials can also give great insight into a contractor’s reliability and quality of work. Don’t hesitate to ask potential candidates about their previous projects to assess their capability.

Additionally, once you find a few potential contractors, schedule consultations to discuss your specific needs. During this process, ensure to ask questions about their installation process, warranties, and maintenance services. A reputable contractor will provide you with a detailed estimate outlining labor, materials, and overall costs. Transparency is key, and a strong contractor will be happy to detail their plan of action.
Questions to Ask Your Ductless HVAC Contractor
What licenses and certifications do you hold?
Can you provide references from past clients?
What kind of warranty do you offer on your work?
How do you

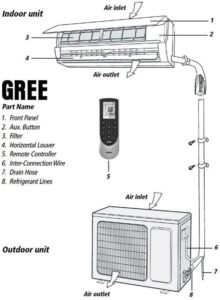
Installing the Mini Split Unit

When it comes to efficient temperature control in your home or office, a mini split unit can be an excellent addition. However, the process of installing a mini split unit is crucial to its performance and longevity. Here are the essential steps to consider during the installation process:

  • Choosing the Right Location: Ideally, the indoor unit should be installed on an inside wall that allows for optimal airflow and space for the outdoor unit.
  • Assessing Structural Integrity: Ensure that the wall where the unit will be mounted can support its weight and is free from any obstructions.
  • Using Professional Help: It’s advisable to work with qualified ductless HVAC contractors who have experience with mini split systems.

To facilitate the installation, follow these steps:

  1. Prepare the Wall: Mark a suitable location for the indoor unit, ideally where the airflow can maximize efficiency.
  2. Drill a Hole: Create a hole for the refrigerant line and electrical connections while ensuring it angles slightly downward to facilitate drainage.
  3. Mount the Bracket: Securely attach the mounting bracket to the wall using appropriate fasteners.
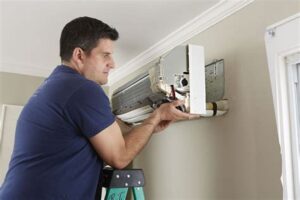
  4. Install the Indoor Unit: Hang the indoor unit on the bracket and connect it to the refrigerant line and electrical supply.
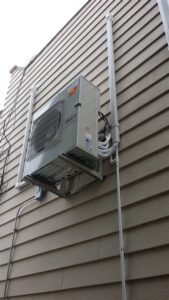
  5. Connect the Outdoor Unit: Position the outdoor unit in a well-ventilated area and make the necessary connections to complete the installation.

Proper sealing and insulating the wall opening is also essential to prevent energy loss and ensure the efficiency of your mini split system. Always seek professional guidance if you feel unsure at any step.

By following these detailed steps and relying on professionals, your mini split installation can

Sealing and Insulating the Wall Opening

When installing a mini-split system, one crucial step often overlooked is sealing and insulating the wall opening. This not only ensures optimal performance of the unit but also contributes to energy efficiency. Properly sealing the installation site prevents air leakage, which can lead to increased energy costs and reduced comfort in your space.

To effectively seal and insulate the wall opening, follow these essential steps:

  • Inspect the Gap: Before applying insulation, check for any gaps or openings around the line set and electrical wiring.
  • Use Insulation Foam: Spray foam insulation is a great option for sealing gaps. It expands to fill voids and provides excellent thermal performance.
  • Install a Vapor Barrier: If your wall is not already equipped with a vapor barrier, consider installing one to prevent moisture buildup.

In addition to these methods, testing the area for air leaks after sealing is advisable. You can use a simple smoke pencil or a blower door test to detect any remaining leaks. Ensuring a fully sealed wall opening is essential for the longevity of your mini-split system, as well as for maintaining the overall energy efficiency of your home.

Frequently Asked Questions

What is a mini split system?

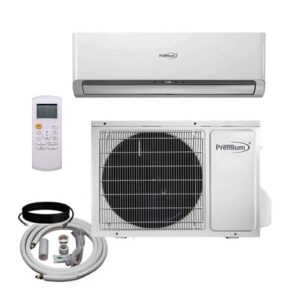
A mini split system is a type of air conditioning and heating system that consists of an outdoor compressor unit and one or more indoor air-handling units.

Can a mini split be installed on an inside wall?

Yes, a mini split can be installed on an inside wall, provided there is adequate clearance and access to the outdoor unit for proper installation and airflow.

What are the benefits of installing a mini split on an inside wall?

Installing a mini split on an inside wall can optimize space utilization, enhance aesthetic appeal, and provide efficient heating and cooling for specific areas.

Are there any specific requirements for installing a mini split on an inside wall?

Yes, the installation area should allow for proper drainage of condensation, sufficient airflow, and access to electrical connections.

Can you install multiple mini splits in a single room?

Yes, multiple mini splits can be installed in a single room to achieve better temperature control and comfort, as long as they are properly configured.

How does the placement of a mini split on an inside wall affect its performance?

The placement affects performance; it should be positioned for optimal airflow and to avoid obstructions that could hinder efficiency.

Do I need a professional to install a mini split system?

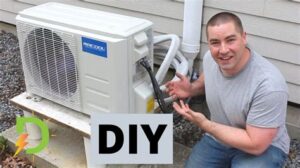
While DIY installation is possible, it’s recommended to hire a professional to ensure proper installation, compliance with local codes, and optimal performance.

Leave a Comment

We use cookies in order to give you the best possible experience on our website. By continuing to use this site, you agree to our use of cookies.
Accept