Discover how to choose, install, and benefit from mini split systems while assessing your home’s HVAC needs with our comprehensive DIY guide.Are you considering a mini split system for your home’s heating and cooling needs? As homeowners become more conscious of energy efficiency and comfort, mini split systems are an increasingly popular choice for climate control. These versatile units can provide personalized comfort while minimizing energy costs. If you’re intrigued by the idea of installing one yourself, you’re in for a rewarding project! In this blog post, we will explore the essentials of mini split systems, helping you assess your home’s HVAC requirements and select the right unit for your space. Additionally, we’ll outline the steps to install a mini split and highlight the benefits of taking on this DIY endeavor. Whether you’re a seasoned DIYer or a first-timer, by the end of this post, you’ll have the knowledge you need to embark on this exciting home improvement project with confidence.
Understanding Mini Split Systems
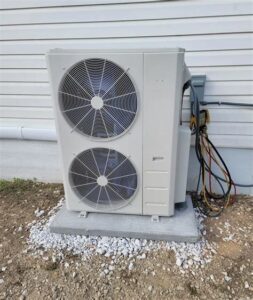
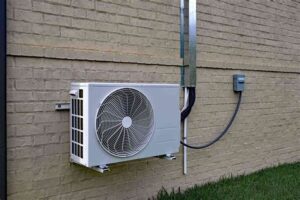
A mini split system is a type of heating and cooling solution that provides flexibility and efficiency for your home. Unlike traditional HVAC systems, which rely on ductwork to distribute air, mini splits use an indoor and outdoor unit that operates independently, allowing for targeted temperature control in individual rooms.
One of the key features of mini split systems is their energy efficiency. They can significantly reduce your electricity bills when compared to conventional systems, especially in homes with specific heating and cooling needs. This makes them particularly attractive for homeowners looking to minimize their environmental impact while maximizing comfort.
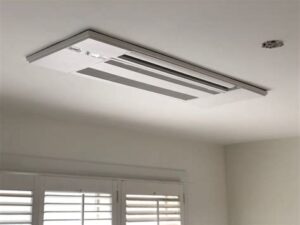
Mini split systems also offer a range of installation options, including wall-mounted, ceiling-mounted, or floor-mounted units. This versatility allows homeowners to choose designs that best fit their aesthetics and functionality requirements. Additionally, these systems can be controlled via remote or smartphone apps, enhancing convenience and ensuring the perfect temperature whenever needed.
In summary, understanding mini split systems is essential for homeowners considering this modern approach to heating and cooling. Their energy efficiency, design flexibility, and ease of control make them an excellent option for anyone looking to improve their home’s climate control without the need for extensive ductwork.
Assessing Your Home’s HVAC Needs
When it comes to ensuring ideal comfort in your home, assessing your HVAC needs is the first critical step. Proper heating, ventilation, and air conditioning are essential for creating a pleasant indoor environment, but understanding what your home specifically requires can help you make informed decisions.
To effectively evaluate your HVAC needs, consider the following factors:
- Home Size: The square footage of your home plays a significant role in determining the type of mini-split system you may need. Larger homes typically require more powerful units.
- Insulation Quality: The level of insulation in your walls, roof, and windows can dramatically influence your HVAC requirements. Better insulation can reduce the need for robust heating or cooling systems.
- Climate: Your geographical location affects HVAC needs. For example, those in hotter climates may prioritize air conditioning capabilities more than heating.
Each of these factors contributes to the overall comfort and efficiency of your HVAC system. Therefore, it’s essential to take the time to evaluate your home accurately to ensure that any installed system can cater to your needs effectively.
Selecting the Right Mini Split
When it comes to selecting the right mini split system for your home, there are several factors to consider. Not all mini splits are the same, and making the right choice can significantly impact your comfort and energy efficiency.
- Capacity: Choose a mini split with the right BTU (British Thermal Unit) rating for your space. A unit that is too small will struggle to cool or heat your room, while one that is too large can cycle on and off frequently, leading to inefficiency.
- Energy Efficiency: Look for the SEER (Seasonal Energy Efficiency Ratio) rating. A higher SEER rating indicates a more energy-efficient unit which can help you save on energy bills.
- Features: Consider additional features such as programmable thermostats, remote control capability, and air purification systems that can enhance your home comfort.
Another essential aspect when selecting the right mini split is determining the number of indoor units you’ll need. If you have multiple rooms to cool or heat, multi-zone systems are available that allow for different settings in each zone, providing customized comfort throughout your home.
Lastly, it’s important to assess the location and installation requirements. Ensure that the unit can be easily installed in your desired location and evaluate whether you’ll be able to handle the
Steps to Install a Mini Split
Installing a mini split system can be a rewarding project for homeowners who are handy and want to save on installation costs. Here are the essential steps you need to follow to ensure a successful installation of your mini split system.
1. Choose the Right Location: Select an appropriate spot for both the indoor and outdoor units. The indoor unit should be installed in a location that ensures proper air circulation, while the outdoor unit needs good ventilation. Avoid placing it near obstacles like trees or tall buildings.
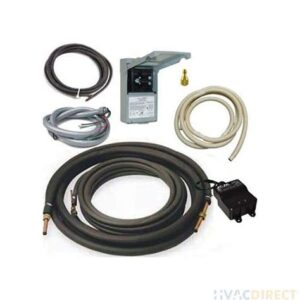
2. Gather the Necessary Tools and Materials: Before you start, make sure you have all the tools and materials you will need, such as a drill, level, wrenches, insulated copper lines, and electrical wiring. A comprehensive list can help prevent unnecessary trips to the hardware store.
3. Install the Indoor Unit: First, mount the bracket for the indoor unit on the wall. Use a level to ensure it is straight. Then, drill a hole through the wall for the refrigerant lines and electrical wires. After that, securely attach the indoor unit according to the manufacturer’s instructions.
4. Set Up the Outdoor Unit: Position the outdoor unit on a stable platform or bracket, making sure it is level and not obstructed. Connect the refrigerant lines and electrical wiring according to the unit’s specifications.
5. Connect the Refrigerant Lines: Connect the insulated copper lines from the indoor unit to the outdoor unit. Ensure that the connections are tight and free of leaks by using a torque wrench.
6. Test the System: Once everything is connected, turn on the unit and check for proper operation. Make sure to check the cooling and heating functions to ensure everything is functioning as expected.
Installing a mini split can be complex, but by following these steps and taking your time, you can successfully install one yourself. Always refer to the manufacturer’s guidelines for specific installation instructions related to your unit.
Benefits of DIY Mini Split Installation
Installing a mini split system can be a rewarding project for homeowners who are looking to enhance their home’s HVAC capabilities while saving on installation costs. By choosing a DIY approach, you can reap numerous benefits that go beyond just financial savings.
One of the primary advantages of DIY mini split installation is the ability to have complete control over the entire process. You can decide where to place the indoor and outdoor units, ensuring optimal airflow and efficiency. Moreover, this personalized approach often results in a better overall installation tailored to your specific home layout and needs.
Additionally, embarking on a DIY mini split installation allows homeowners to gain valuable skills and knowledge about HVAC systems. This hands-on experience can be beneficial for future home improvement projects, as well as for understanding the maintenance and troubleshooting of your mini split system. Not only do you save money, but you also enhance your home improvement proficiency.
In conclusion, if you are handy and willing to invest the time to learn and follow the instructions, the benefits of DIY mini split installation can be significant. You gain better control of the project’s details, an opportunity to learn new skills, and of course, the satisfaction of completing the job yourself.
Frequently Asked Questions
What is a mini split system?
A mini split system is a type of heating and cooling system that consists of an outdoor compressor unit and one or more indoor air handlers, allowing for zoned temperature control.
Can a homeowner install a mini split system themselves?
Yes, a homeowner can install a mini split system themselves, but it requires technical knowledge, and proper tools, as well as following local building codes and regulations.
What tools are needed to install a mini split?
To install a mini split system, you’ll need tools such as a line set, electrical wiring, a vacuum pump, wrenches, screwdrivers, a level, and possibly a drill.
Are there any special permits required to install a mini split?
In many areas, you may need a permit to install a mini split system, especially if it involves electrical work or modifications to the home’s structure.
What are the benefits of installing a mini split system?
Benefits of installing a mini split system include energy efficiency, flexible zoning options, easy installation, and the potential for both heating and cooling.
How long does it take to install a mini split system?
The installation time for a mini split system can vary, but it typically takes between 4 to 8 hours for a single zone installation, depending on the home’s layout and complexity of the job.
What are common mistakes to avoid when installing a mini split?
Common mistakes include improper sizing of the system, incorrect positioning of indoor units, poor insulation of refrigerant lines, and neglecting to secure permits.


