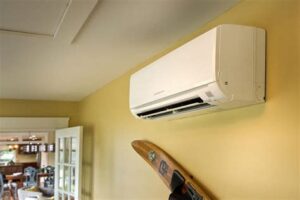
Discover the benefits of mini split systems, learn installation tips, tools, and maintenance for optimal performance in this comprehensive guide.Are you considering upgrading your home’s heating and cooling system? Installing a Blueridge mini-split system could be the ideal solution. Known for their energy efficiency and versatility, mini-split systems allow for precise climate control while saving you money on energy bills. In this blog post, we’ll explore the numerous benefits of mini-split systems, guide you in choosing the perfect installation location, and list the essential tools and equipment you’ll need. We’ll provide a comprehensive step-by-step installation guide, ensuring you have all the insights necessary for a successful project. Finally, we’ll cover final testing and ongoing maintenance tips to keep your system running smoothly. Whether you’re a DIY enthusiast or just looking to enhance your home comfort, this guide will provide everything you need to know about Blueridge mini-split installation. Let’s dive in!
Benefits of Mini Split Systems
Mini split systems have gained significant popularity for both residential and commercial heating and cooling needs. One of the primary benefits of mini split systems is their energy efficiency. Unlike traditional HVAC systems, mini splits allow for zoned heating and cooling, meaning you can control the temperature in individual rooms. This feature not only enhances comfort but also reduces energy bills significantly.
Another notable perk is the flexibility in installation. Mini split systems do not require ductwork, which makes them easier to install in various locations, including homes that lack existing duct systems. The compact size and design of mini splits allow them to be placed in many different areas without taking up valuable floor space. Furthermore, they often include advanced features like inverter technology, which adjusts the compressor speed for optimized performance.
The third major benefit is the improved indoor air quality. Mini split systems are equipped with advanced filtration systems that can significantly reduce allergens and pollutants in the air, promoting a healthier living environment. They also offer quiet operation, making them an excellent choice for bedrooms and other spaces where noise can be a concern.
Choosing the Right Location
When it comes to installing a Blueridge mini split system, choosing the right location is crucial for optimal performance and efficiency. Here are some key factors to consider when selecting the spot for your unit:
- Proximity to an Outside Wall: Position your indoor unit close to an exterior wall to simplify the installation of the refrigerant lines and drainage.
- Air Flow: Ensure that the unit is placed in an area where air can circulate freely, avoiding obstructions like furniture or curtains.
- Height: Install the indoor unit a few inches below the ceiling line for better air distribution throughout the room.
- Accessibility: Choose a location that allows easy access for maintenance and repairs.
- State of the Room: Consider the usage of the room; for example, avoid placing the unit in a corner of an underutilized space.
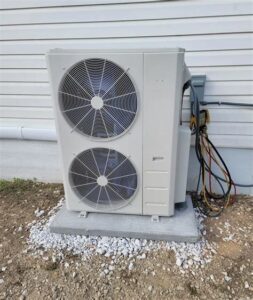
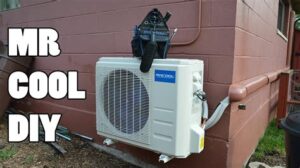
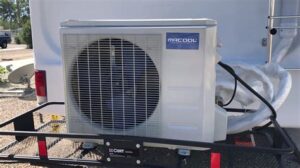
Additionally, it is essential to think about the outdoor unit’s location. The outdoor compressor should be installed in a position where it has adequate airflow and is not exposed to debris or extreme weather conditions. Placing it in the shade can also enhance performance during the hotter months.
Before making a final decision, consider consulting with a professional installer to ensure the location chosen aligns with the ma
Key Tools and Equipment Needed
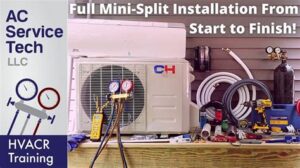
When installing a Blueridge mini split system, having the right tools and equipment is essential for a successful installation. Below is a list of key tools and equipment you will need to ensure the process goes smoothly:
| Tool/Equipment | Purpose |
|---|---|
| Drill | To create holes for mounting the indoor and outdoor units. |
| Level | To ensure that the units are installed straight and level. |
| Vacuum Pump | To remove air and moisture from the refrigerant lines. |
| Refrigerant Gauge Set | To monitor and control the refrigerant levels during charging. |
| Wrench Set | To tighten fittings and connections securely. |
| Wire Strippers | To prepare electrical wires for connection. |
| Safety Gear | To protect yourself during installation (gloves, goggles, etc.). |
Additionally, it’s important to have the appropriate refrigerant for your Blueridge mini split system. Make sure you check the specifications in the installation manual to use the right type and amount. Using the correct refrigerant is vital for the efficiency and longevity of your system.
Moreover, before you begin the installation, familiarize yourself with the manufacturer’s instructions. This ensures that you have all the necessary parts and tools for the mini split installation, thus allowing for an efficient and effective setup.
Lastly, don’t forget to have an extra pair of hands if possible. Certain steps in the installation might require lifting heavy components or placing the indoor unit securely. Teamwork will make the process more manageable, enhancing safety and efficiency.
Step-by-Step Installation Guide
Installing a Blueridge mini split system may seem daunting, but with the right guidance, you can achieve a successful installation. Follow this step-by-step guide to ensure efficiency and functionality in your new heating and cooling system.
Step 1: Gather Your Tools
Before starting the installation, make sure to have the following tools on hand:
- Drill
- Screwdriver set
- Level
- Pipe cutter
- Hex key set
- Vacuum pump
- Refrigerant gauge set
Step 2: Choose the Right Location
Selecting the right placement for both the indoor and outdoor units is crucial. Consider the following guidelines:
- Place the indoor unit high on a wall for optimal air circulation.
- Ensure the outdoor unit is on a stable surface, away from obstructions and debris.
- Maintain the recommended distance between the indoor and outdoor units as per the manufacturer’s instructions.
Step 3: Install the Wall Mount Bracket
Once the location is determined, install the wall mount bracket by following these steps:
- Use a level to ensure the bracket is straight.
- Secure the bracket to the wall using appropriate anchor screws.
Step 4: Drill the Hole for Refrigerant Lines
Drill a hole through the wall to accommodate the refrigerant lines, ensuring it’s slightly angled downward to allow water drainage.
Step 5: Connect Refrigerant Lines
After installing the indoor unit, connect the refrigerant lines and electrical wiring carefully. Ensure there are no leaks and that all connections are tight.
Step 6: Set up the Outdoor Unit
Install the outdoor unit, ensuring it’s level, connected properly, and free from obstructions such as bushes or fences.
Step 7: Vacuum the System
Use a vacuum pump to eliminate moisture and air from the system. Follow the manufacturer’s guidelines on how long to run the pump.
Step 8: Test the System
Once everything is connected, power up the system. Check for any unusual sounds, leaks, or other issues. Make sure the indoor and outdoor units are functioning properly.
With these detailed steps, you can confidently proceed with the installation of your Blueridge mini split system, ensuring a comfortable environment in your home.
Final Testing and Maintenance
After successfully completing the installation of your Blueridge mini split system, it is vital to conduct thorough final testing and establish a regular maintenance routine. This ensures that your system operates efficiently and prolongs its lifespan.
During the final testing phase, check the following:
- Temperature Control: Set the desired temperature and ensure the system reaches it adequately.
- Noise Levels: Listen for unusual noises that might indicate issues.
- Airflow: Verify that the airflow is consistent and unobstructed.
For ongoing maintenance, consider these essential tasks:
Regularly clean or replace air filters, inspect drain lines, and check refrigerant levels to maintain optimal performance.
By diligently performing these final tests and setting up a maintenance schedule, you can maximize the efficiency and longevity of your Blueridge mini split system.
Frequently Asked Questions
What is a mini-split system?
A mini-split system is an energy-efficient heating and cooling system that consists of an outdoor compressor unit and one or more indoor air-handling units.
What are the benefits of installing a Blueridge mini-split?
Blueridge mini-splits offer flexible installation options, energy efficiency, quiet operation, and the ability to control the temperature in individual zones.
Do I need professional help to install a Blueridge mini-split?
While some homeowners may attempt a DIY installation, it is recommended to hire a professional for proper installation and to ensure compliance with local codes.
What tools are required for the installation of a Blueridge mini-split?
Common tools needed include a drill, wrench set, level, ductless mounting brackets, and refrigerant line installation tools.
How long does it typically take to install a mini-split system?
The installation time for a mini-split system can vary, but it typically takes between 4 to 8 hours depending on the complexity of the setup.
Can a Blueridge mini-split be installed in multiple rooms?
Yes, a single outdoor unit can support multiple indoor units, allowing you to efficiently heat or cool multiple rooms.
What maintenance is required for a Blueridge mini-split system?
Regular maintenance includes cleaning the filters, ensuring the outdoor unit is clear of debris, and scheduling professional inspections at least once a year.
