Discover how to install mini splits easily with our step-by-step guide, assessing complexity and expert tips to simplify the process.When it comes to home heating and cooling solutions, mini-split systems have gained considerable popularity for their efficiency and flexibility. But a common question homeowners have is whether mini splits are hard to install. In this blog post, we’ll explore the ins and outs of mini splits, starting with an understanding of how they work and the benefits they offer. We’ll assess the factors that influence installation difficulty, from the layout of your space to your previous experience with similar projects. Furthermore, we’ll provide a step-by-step installation process, complemented by valuable tips to make the task easier. Whether you’re a seasoned DIYer or a novice, this guide will equip you with the knowledge you need to determine if a mini-split installation is within your reach.
Understanding Mini Splits
Mini splits are becoming increasingly popular for both heating and cooling needs in residential and commercial properties. They offer a flexible, energy-efficient solution that allows for zoning, meaning you can control the temperature in different areas of your space independently.
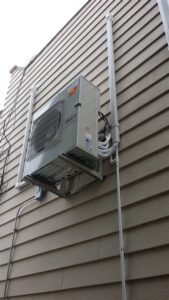
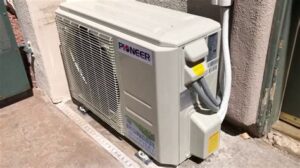
Essentially, a mini split system comprises two main components: an outdoor compressor unit and one or more indoor air handling units. This design eliminates the need for extensive ductwork, which can not only reduce installation complexity but also enhance energy efficiency.
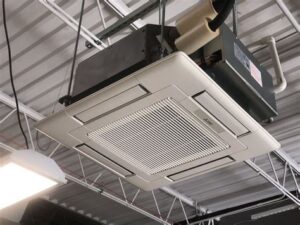
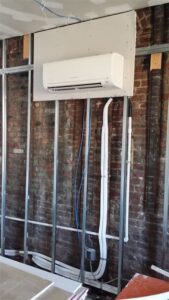
One of the key benefits of mini splits is their flexibility in installation. They can be mounted on walls, ceilings, or even recessed into spaces, making them suitable for various architectural designs. Additionally, the ease of installation can vary based on factors such as the specific model chosen and your home’s existing infrastructure.
In summary, understanding mini splits and their functionalities can help homeowners make informed decisions regarding their heating and cooling systems. With proper knowledge, the complexity of the installation process can be tackled effectively.
Assessing Installation Difficulty
When considering the installation of a mini split system, it’s essential to assess the installation difficulty based on various factors. Understanding these elements can help you decide whether to tackle the project yourself or hire a professional.
The complexity of the installation can be influenced by several key factors:
- Type of Mini Split System: Different models may have varying levels of complexity in installation.
- A location of installation: Installing in a tight or hard-to-reach space presents greater challenges.
- Electrical and Plumbing Requirements: If your setup requires extensive electrical work or plumbing adjustments, the difficulty increases significantly.
As a result, evaluating your skill level, the tools available, and your understanding of HVAC systems will play a crucial role in determining if you should attempt a DIY installation or seek professional help. Always remember: tackling more complicated installations without the right expertise can lead to costly mistakes.
Factors Affecting Installation Complexity
When considering whether mini splits are hard to install, multiple factors come into play that can impact the overall installation complexity. Understanding these factors can help both DIY enthusiasts and professionals anticipate challenges associated with the installation process.
Below are some key elements to consider regarding the complexity of installing mini splits:
- Location: The geographical location can impact factors like ambient temperature, which influences refrigerant performance and unit efficiency.
- Mounting Surface: The type of wall or surface where indoor units are mounted can complicate the installation. For instance, concrete walls require different tools compared to drywall.
- Wiring and Electrical Requirements: Proper electrical configuration is crucial. Ensuring that electrical lines are easily accessible and meet code requirements can streamline the process.
- Refrigerant Line Length: Longer refrigerant lines may require additional skills and tools for proper insulation and handling.
- Drainage Solutions: Minimizing drainage issues is essential. The installation’s complexity increases if the site lacks proper drainage pathways.
All these factors play a significant role in determining how straightforward or challenging the installation of mini splits can be. Evaluating these
Step-by-Step Installation Process
Installing a mini split system can be a manageable task if approached methodically. Here’s a step-by-step guide to help you through the process.
1. Gather Necessary Tools and Materials
Before starting, ensure you have all the required tools and materials:
- Mini split kit
- Drill and drill bits
- Wrench set
- Refrigerant lines
- Electrical wires
- Tape measure
- Level
2. Choose the Right Location
Select a suitable location for both the indoor and outdoor units. The indoor unit should be centrally located for optimal air distribution, while the outdoor unit requires adequate clearance and airflow.
3. Install the Indoor Unit
Follow these basic steps to install the indoor unit:
- Mount the bracket on the wall and ensure it is level.
- Drill a hole through the wall for the refrigerant lines and drain line.
- Attach the indoor unit onto the bracket.
4. Install the Outdoor Unit
Next, install the outdoor unit:
- Position the unit on a stable surface, ensuring it’s level.
- Connect the refrigerant lines and electrical wires from the indoor unit to the outdoor unit.
5. Make Electrical Connections
Follow the manufacturer’s instructions to make the necessary electrical connections safely. Ensure you disconnect the power before starting this step.
6. Test the System
Once everything is connected, it’s time to test your mini split system:
- Turn on the power.
- Check for any refrigerant leaks.
- Verify the operation of both the indoor and outdoor units.
By following this step-by-step installation process, you can confidently install your mini split system with reduced stress and maximize your comfort.
Keep in mind that if at any point you feel unsure, it’s perfectly okay to consult a professional to ensure proper installation.
Proper installation is key to the efficiency and longevity of your mini split system, making attention to detail in each step of the process essential.
Tips for Easier Mini Split Installation
If you’re considering installing a mini split system, you might be wondering if the process will be daunting. The truth is, with the right preparation and approach, *mini split installation* can be a manageable task. Here are some essential tips to ensure a smoother experience.
1. Read the Manual: Before you begin, take the time to thoroughly read the installation manual provided by the manufacturer. Understanding the specific requirements and guidelines will save you time and prevent mistakes.
2. Gather the Right Tools: Make sure you have all the necessary tools on hand before starting the installation. Generally, you will need a level, drill, measuring tape, stud finder, and an HVAC vacuum pump. Having these items ready can streamline the process significantly.
3. Choose the Right Location: Selecting an appropriate location for both the indoor and outdoor units is crucial. Ensure there’s enough space around them for proper airflow and maintenance. Additionally, think about placing them within proximity to your existing electrical and plumbing lines to minimize additional work.
4. Consider Professional Help: While many homeowners can successfully install a mini split, do not hesitate to consult professionals for complex installations, especially if you face electrical work or require additional refrigerant lines. This can save you time and ensure safety.
5. Follow Local Codes: Ensure you are aware of and comply with local building codes and regulations regarding HVAC installations. Neglecting these can lead to costly repairs down the line.
By following these tips and preparing adequately, you can minimize the challenges associated with *mini split installation*. Remember, it’s essential to prioritize safety an
Frequently Asked Questions
What are mini splits?
Mini splits are a type of heating and cooling system that consists of an outdoor unit and one or more indoor air handling units. They provide efficient temperature control without the need for ductwork.
Are mini splits difficult to install for a DIY enthusiast?
While some homeowners may handle the installation of mini splits themselves, it requires technical skills and tools, making it challenging for those without experience in HVAC systems.
What tools are needed for installing mini splits?
Essential tools for mini split installation include a drill, wrenches, a vacuum pump, a refrigerant scale, and possibly a ladder for mounting the indoor units.
How long does it typically take to install a mini split system?
The installation of a mini split system can take anywhere from 4 to 8 hours, depending on the complexity of the setup and the number of indoor units being installed.
What are common mistakes to avoid when installing a mini split?
Common mistakes include improper placement of indoor units, incorrect sizing of the system, neglecting electrical connections, and failing to evacuate air from the refrigerant lines.
Do mini splits require maintenance after installation?
Yes, mini splits require regular maintenance, including cleaning the filters, checking refrigerant levels, and inspecting electrical components to ensure efficient operation.
Should I hire a professional or attempt to install a mini split myself?
If you have experience with HVAC systems and feel confident in your skills, you may consider a DIY installation. However, hiring a professional is often recommended for proper installation and warranty purposes.


